If this is your first visit, be sure to
check out the FAQ by clicking the
link above. You may have to register
before you can post: click the register link above to proceed. To start viewing messages,
select the forum that you want to visit from the selection below.
Announcement
Collapse
No announcement yet.
How To. Bitspower in-line temp sensor + XSPC LCD = Joy ( from Bit-tech.net)
bought these both a while back, still havent put them together, but good thing i read this or else when im redoing my water cooling loop very soon i would have gone crazy trying to figure out how to get the probe to display. Very helpful.
The link to someone else's mod is great, but i'ts outdated.
If you use the newer XSPC Mini LCD Display with Temperature Sensor and Bitspower Coolant Temperature Sensor Stop Fitting it's done differently.
Please note: if you get the Xspc LCD Temperature Display V2 + Flat Temp Sensor, you can just unplug the xspc temperature probe and plug in the bitspower temperature probe. No cutting of wires or soldering needed.
For those of you that are not expert at soldering, my recommendation is;
Just cut the 2 sensor wires 1~2 inches from the LCD display.
Cut the connector off the Bitspower temperature probe.
Now strip 1/16th~1/8th inch of plastic from all four wires. Dip/cover them in flux and tin them. ( To tin them, use your soldering iron to heat the wire and melt the solder through the wire, not just covering it. )
Slide a half inch piece of shrink wrap over each of the bitspower probe wires. About an inch or two behind the bare wire. Shrink wrap is available at Dazmode or radio shack / circuit city.
Now, solder one bitspower probe wire to one of the original temperature probe wires of/from the lcd. Now solder the other probe wire to the remaining temperature wire.
Slide the shrink wrap over the solder joint and gently heat until shrunk.
It may not be as pretty or artistic as what the guy's around here do, but, it will work.
Now for those artists that are adept if not expert at soldering, this is how it's done;
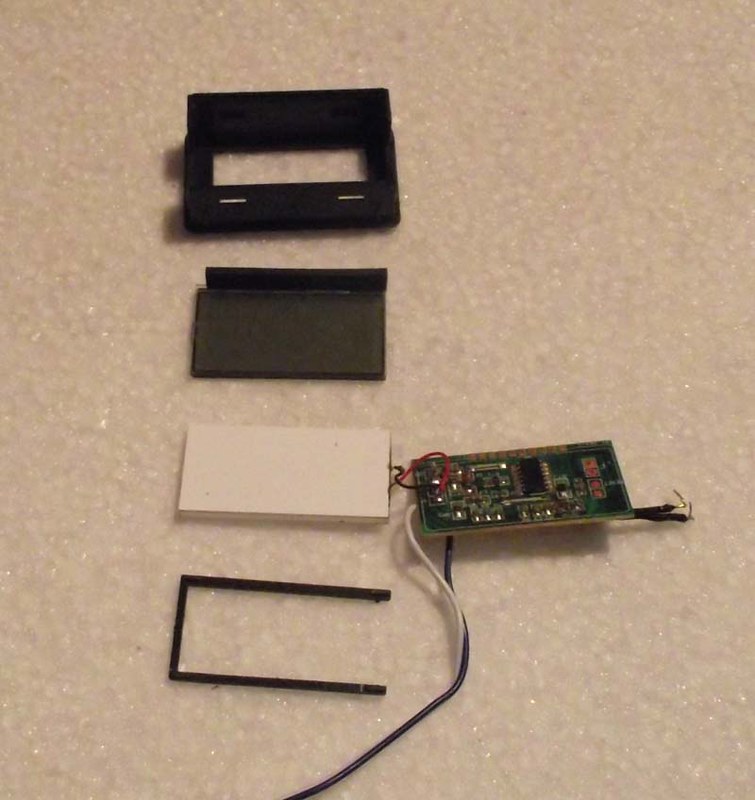
If you look at the back of the lcd, you'll see one side has two slits. A small flat head screwdriver will easily fit in each and allow you to pop off the back without resorting to cutting the plastic. Pry one side, hold it with your thumb or finger and then pry the other side, and lift out gently.
After you lift out the back, you'll note that you are looking at the back of the circuit / control board with the wires protruding from that side.
Now you'll find holes at each side of the case that will allow you to lift the circuit board out. Be careful, under the power wires the board is connected to the lcd with very fine wires. You'll find a large plastic U that separates the circuit board from the lcd with the open end where the wires connect the two.
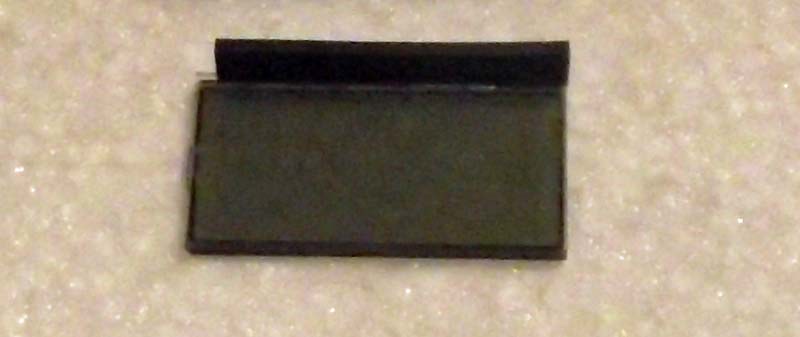
Under the lcd you'll find a clear piece of plastic that protects the lcd.
Take note, the clear plastic has a rubber edge attached to it.
Use your soldering gun/iron and remove the two probe wires.
Cut the connector off the bitspower temperature probe. Strip a quarter inch of plastic off each wire and then tin both.
Since the solder has probably filled the holes, you'll need to heat the solder while applying pressure on the wire from the back until the wire is through the hole. Do this for both wires and assure yourself it's a good bond on the circuit side of the board.
Now you are ready to reassemble.
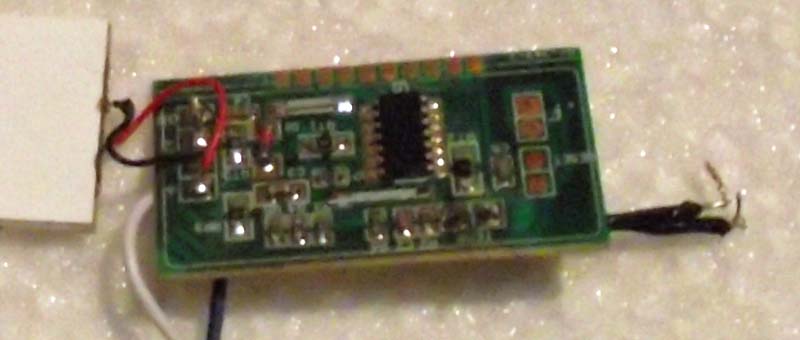
Place the plastic with rubber side inside the case. Before you place the lcd, separator and circuit board back in, note that one side of the circuit board has ten copper connectors.
These connectors must rest on top of the rubber edge that was/is connected to the lcd protective plastic or the lcd will not function. The light will come on, but no numbers will be present.
Now with the protector, lcd, separator and circuit board in place, move the back of the case into position with the wire cutout lined up closest to the probe wires, guide them into the cutout and click the back into place.
Now test it by plugging it into a live circuit .... it'll give you the room temperature or drop it in a glass of water with a digital meat thermometer. Mine was accurate within .1 degree celcius.
It's ready to be added to your water cooling system.
mikej
Last edited by wolfslayer1; 07-06-2013, 03:28 AM.
Reason: Adding new information. correcting links
Folding @ Home : For the Health of Mankind
Asus x79 Sabertooth M/B
Intel I7-3930 @ 4.6g ghz (watercooled) cpu
2 X 128 gig Adata SSD's in Raid 0 : 2 Terabyte Seagate H/D
1 LG bluray/dvd rewriter
32 gigs Geil pc3-12800
Zotac 780 Amp 3gig memory GPU
PcP&C 910 Silencer
Phobya UC-1 Extreme Intel : Monsta 420mm Rad & 3 x FHP-141 push & 3 X D14SH-12 pull : 2 x RX 360mm rad & 6 x FM121 fans push: XSPC D5 Dual Bay & 2 X D5 Vario Pump : Tubing - 1/2in. ID X 3/4in. OD
 Tweet
Tweet


Comment