 Tweet
Tweet
Hey all! So I originally did a build back last year - Just a nweb and my first build - and am at it again 
I picked up an LD PC-V7 case from Daz earlier this year and just transplanted the build into it (total rush job, took about 2 hours from shutting down the machine to starting it up and using it, knock on wood I had no problems ), but I've picked up a bunch of new stuff to clean the whole build up and thought I'd post pictures of the process
Day 1 - Disassembly
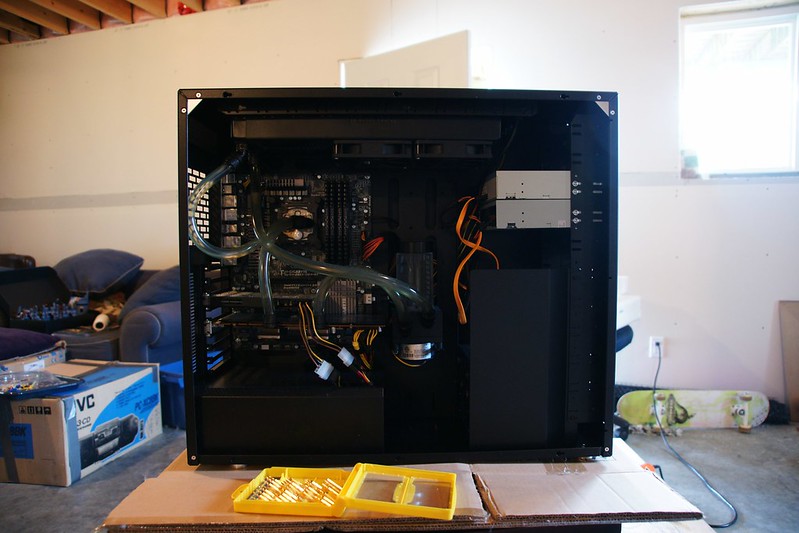
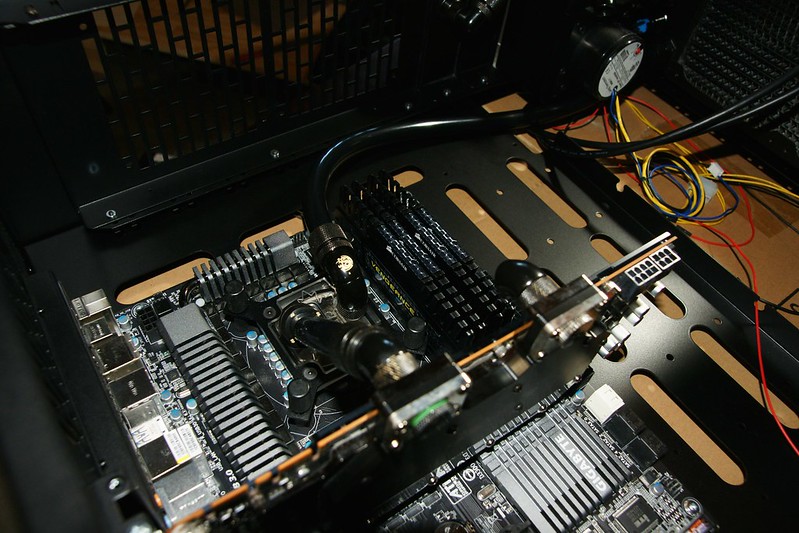
Starting the process, what the quick-fix job had looked like:
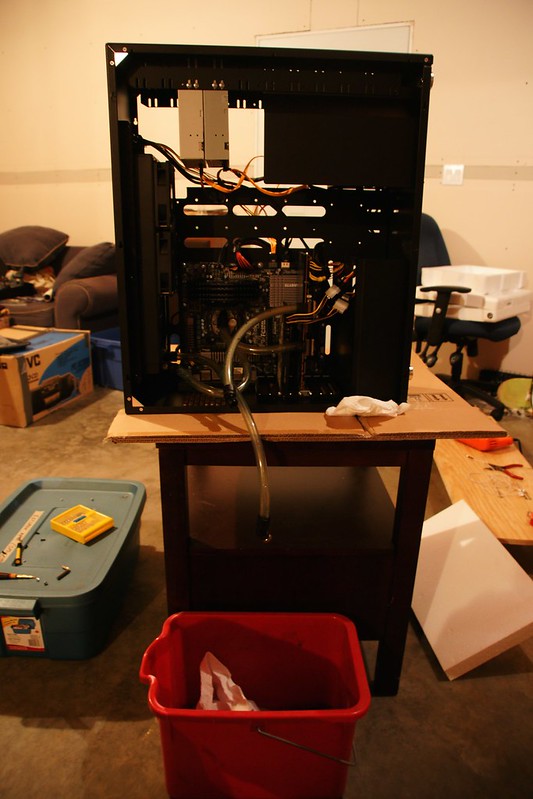
Much easier to drain this one than the other build. When I drained my Antec 1200 (which is a beast compared to this case, man, that steel makes a huge weight difference) I didn't have a single extra fitting, so I taped a funnel over the top of the res and flipped the whole case upside-down. It actually worked surprisingly well with minimal spillage.
Draining actually in progress. At this point I had to go out for the remainder of the evening so things picked up the next day.
Day 2 - Modding
My plan with this case was to do something slightly different - I hadn't been much of a fan of the cylindrical res inside the case and the V7 has a bay-mount compatible system along the entire top as well as the front. I had picked up the EK-WB dual-bay res + pump mount combo and was going to mount that along the top of the case, as well as use one of the bay-mount covers to insert a fill/drain port. One of these things worked as planned, others didn't as much
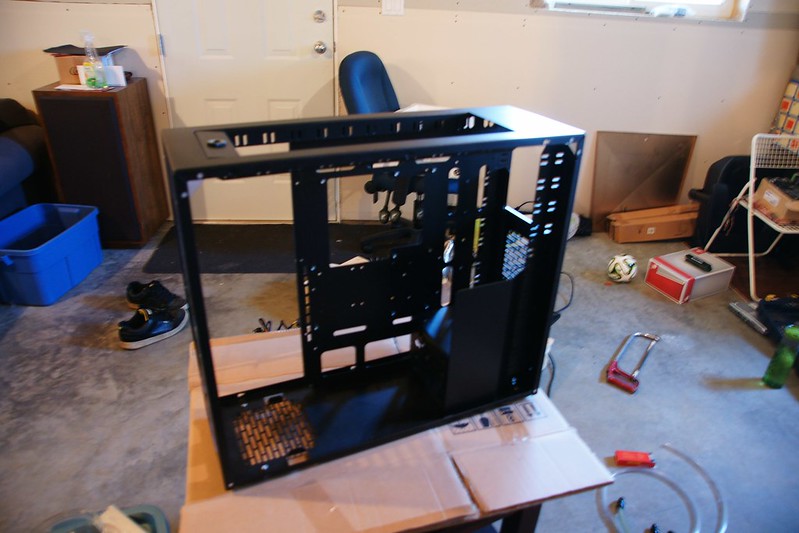
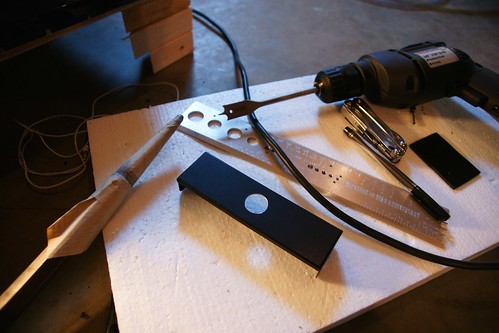
I realized I was going to have to pretty much disassemble the entire case to do what I needed to do - shortly after I realized that the mounting rails along the tops weren't deep enough.
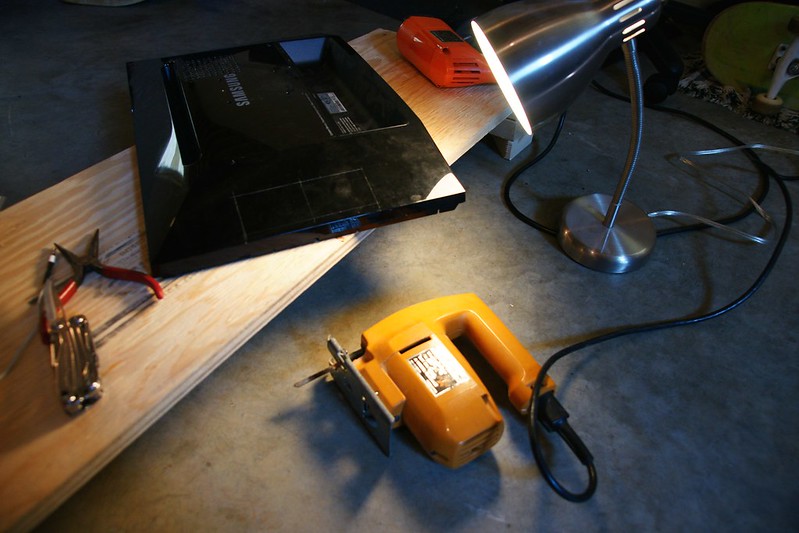
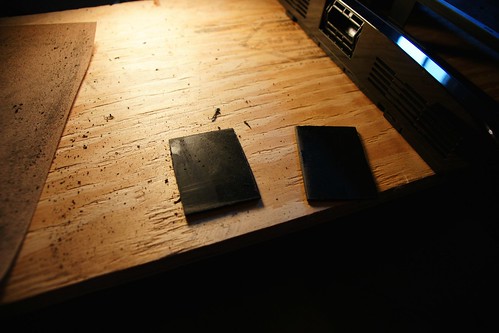
I have the case from an old monitor! Time to break out the cutting tools and make some custom brackets.
Note 1: I'm impatient, so I tend to just throw something together myself. Also, this is my only PC so I'm aiming to have it up and running again sooner rather than later
Note 2: I don't *exactly* have the best tools. No dremel or similar, and that jigsaw was my grandfather's and is ~40 years old (Page 2 of this 1978 newspaper - the "Merry Christmas" sale section)
Notes above aside - things turned out fairly well!
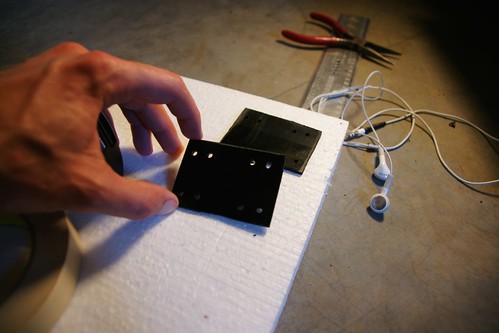
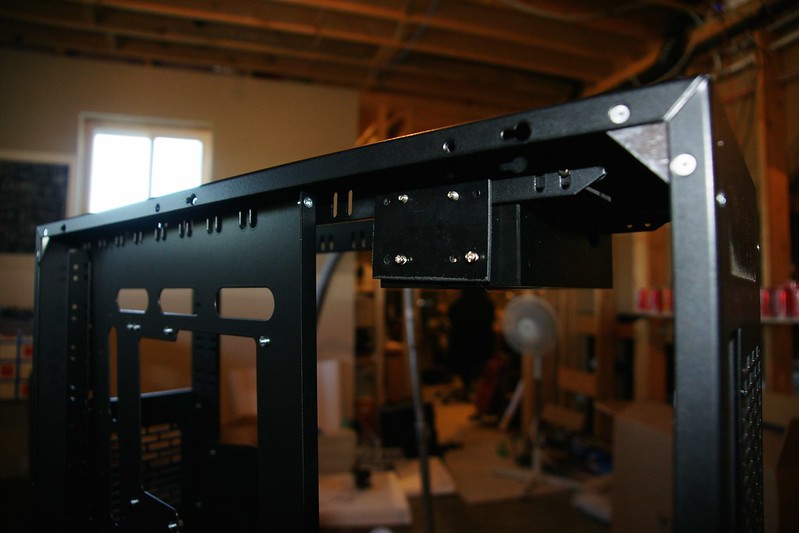
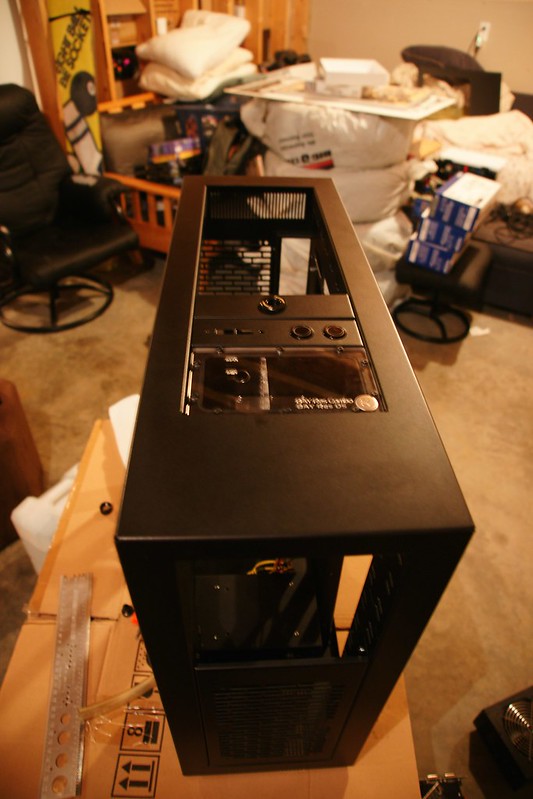
Test fitting them on the case. I really lazed out on the screw holes - basically eyeball marked them, but it still worked out. I ended up having to put one bracket on the outside of the bay rail, and one on the inside due to the res being slightly narrower. I also ended up putting the res at the front of the case, but that part comes later
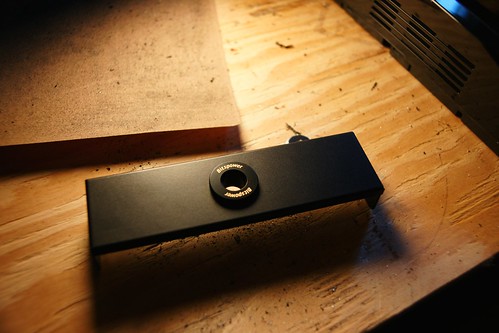
Next up was the modification for the fill port. This turned out great, probably due to its simplicity and the fact that I actually measured things out (although I was still off-centre by about 1mm).
Note 1: No, of course that's not a proper metal router bit - you actually think I have one of those?
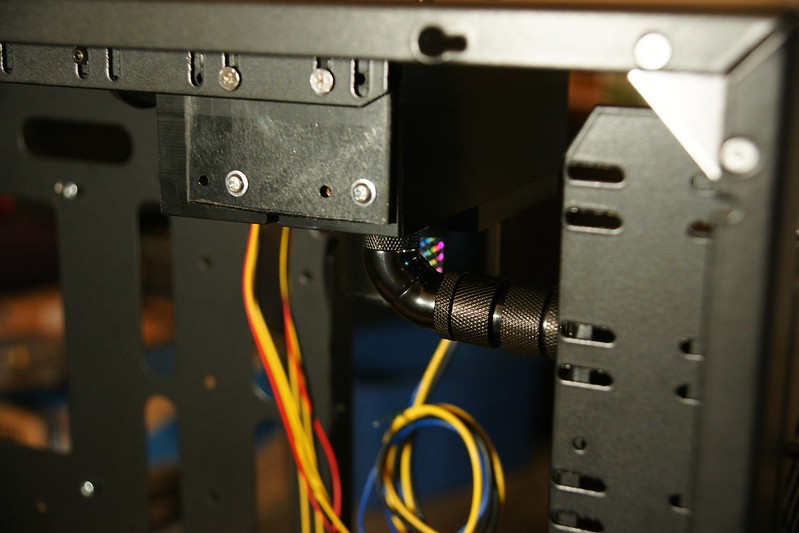
This is where I ran into another unexpected snag - there was no way I could (with the assortment of fittings on hand) run a line from the drain port on the res to the modded fill port if the bay cover was right next to the res - I think I figured out that I'd need to purchase 1 or 2 additional fittings, as well as get a custom 4 or 5mm extension in order to make things work. With that new knowledge, I moved the res right to the front, put a spacer in, then put the drain/fill port. I had the button/USB plate there at first, but moved that later.
Alright, we've got the res/pump combo and fill port sorted out. Time to dump the triple-rad in the front (that part worked fine - no snags). I almost had a snag connecting the res to the rad, but things couldn't have lined up more perfectly. This is probably my favourite part of the whole loop - I had to measure a 17mm piece of tube to connect those two fittings on the right. There's 3-4mm of hose exposed, but everything just lined up, didn't even have to force it (was a sight pain to get the fittings on, but not too bad).
A shot of the back of the res, can see everything lining up nicely.

The "easy" part now begins - finishing up the rest of the tube. The angle connector from the CPU to GPU blocks also lined up nearly perfectly, super happy about that.
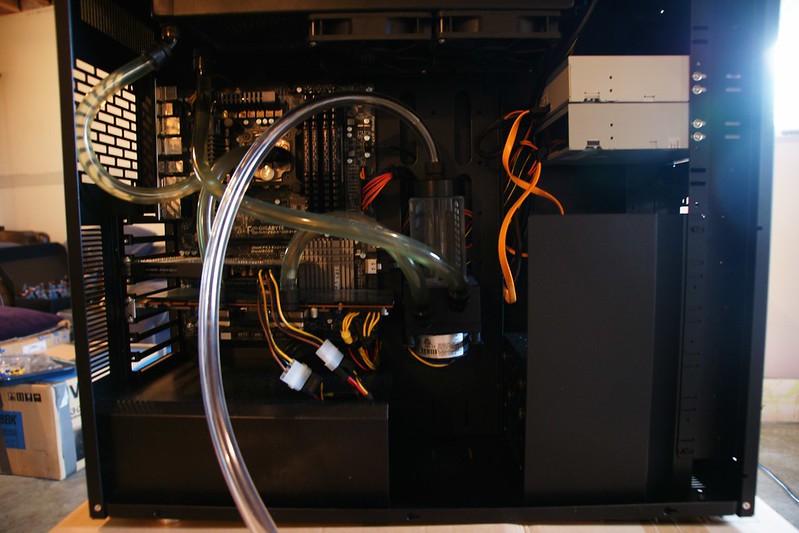
Tubing all completed!

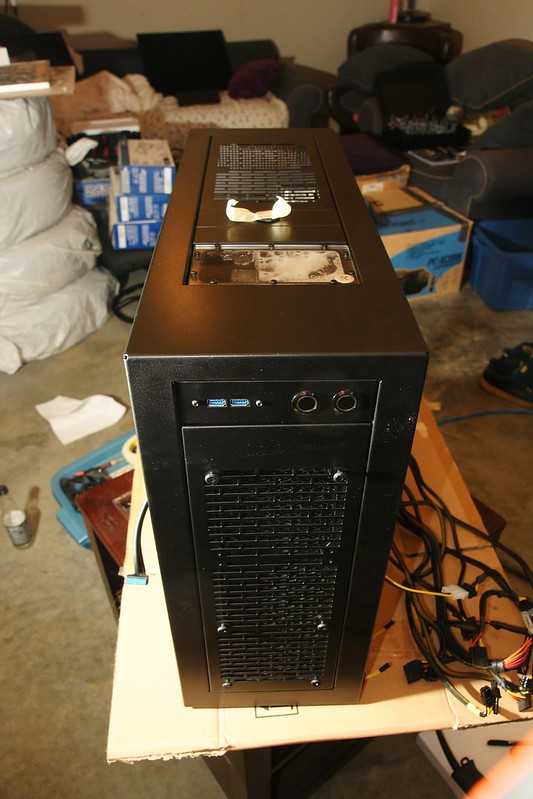
Lookit the sexy beast! OK, still needs some slight panel adjustments to line up better, and some dusting. Happy all-in-all, though Only waiting on a drain port plug to finish off this part of the build (where the masking tape currently is).
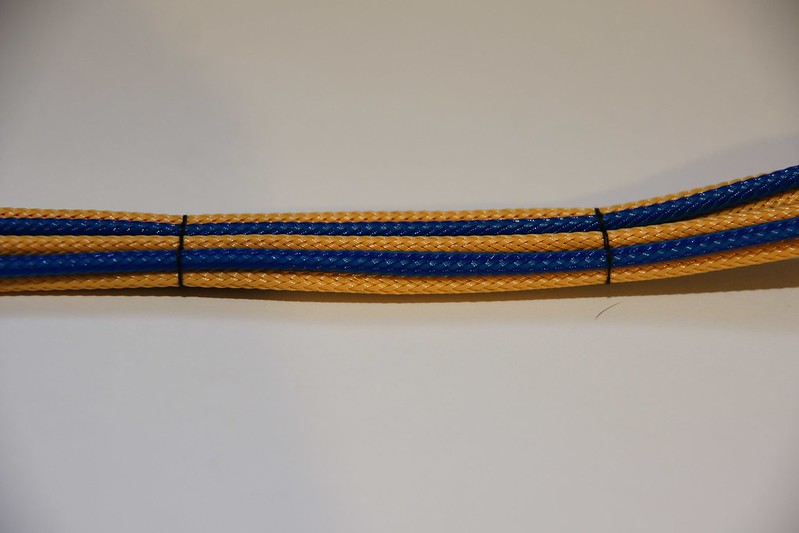
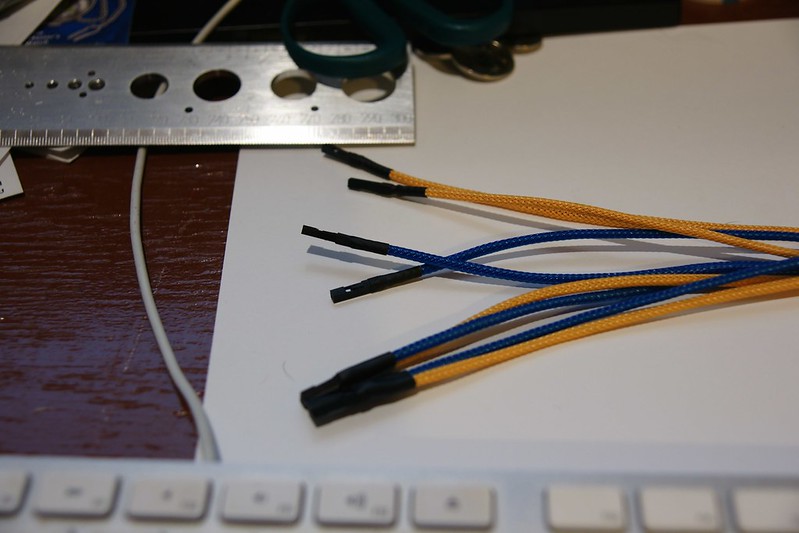
This is just part one of the upgrade - I also have a pile of sleeving and a new PSU sitting here, but as I'd like to have the PC available most of the time, I'm going to get as many things sleeved as possible without having to offline my machine. I haven't yet decided what I'm going to do about sleeving the pump, though. That one was a bit of an oversight.
I picked up an LD PC-V7 case from Daz earlier this year and just transplanted the build into it (total rush job, took about 2 hours from shutting down the machine to starting it up and using it, knock on wood I had no problems
), but I've picked up a bunch of new stuff to clean the whole build up and thought I'd post pictures of the process Day 1 - Disassembly
Starting the process, what the quick-fix job had looked like:
Much easier to drain this one than the other build. When I drained my Antec 1200 (which is a beast compared to this case, man, that steel makes a huge weight difference) I didn't have a single extra fitting, so I taped a funnel over the top of the res and flipped the whole case upside-down. It actually worked surprisingly well with minimal spillage.
Draining actually in progress. At this point I had to go out for the remainder of the evening so things picked up the next day.
Day 2 - Modding
My plan with this case was to do something slightly different - I hadn't been much of a fan of the cylindrical res inside the case and the V7 has a bay-mount compatible system along the entire top as well as the front. I had picked up the EK-WB dual-bay res + pump mount combo and was going to mount that along the top of the case, as well as use one of the bay-mount covers to insert a fill/drain port. One of these things worked as planned, others didn't as much
I realized I was going to have to pretty much disassemble the entire case to do what I needed to do - shortly after I realized that the mounting rails along the tops weren't deep enough.
I have the case from an old monitor! Time to break out the cutting tools and make some custom brackets.
Note 1: I'm impatient, so I tend to just throw something together myself. Also, this is my only PC so I'm aiming to have it up and running again sooner rather than later
Note 2: I don't *exactly* have the best tools. No dremel or similar, and that jigsaw was my grandfather's and is ~40 years old (Page 2 of this 1978 newspaper - the "Merry Christmas" sale section)
Notes above aside - things turned out fairly well!
Test fitting them on the case. I really lazed out on the screw holes - basically eyeball marked them, but it still worked out. I ended up having to put one bracket on the outside of the bay rail, and one on the inside due to the res being slightly narrower. I also ended up putting the res at the front of the case, but that part comes later
Next up was the modification for the fill port. This turned out great, probably due to its simplicity and the fact that I actually measured things out (although I was still off-centre by about 1mm).
Note 1: No, of course that's not a proper metal router bit - you actually think I have one of those?
This is where I ran into another unexpected snag - there was no way I could (with the assortment of fittings on hand) run a line from the drain port on the res to the modded fill port if the bay cover was right next to the res - I think I figured out that I'd need to purchase 1 or 2 additional fittings, as well as get a custom 4 or 5mm extension in order to make things work. With that new knowledge, I moved the res right to the front, put a spacer in, then put the drain/fill port. I had the button/USB plate there at first, but moved that later.
Alright, we've got the res/pump combo and fill port sorted out. Time to dump the triple-rad in the front (that part worked fine - no snags). I almost had a snag connecting the res to the rad, but things couldn't have lined up more perfectly. This is probably my favourite part of the whole loop - I had to measure a 17mm piece of tube to connect those two fittings on the right. There's 3-4mm of hose exposed, but everything just lined up, didn't even have to force it (was a sight pain to get the fittings on, but not too bad).
A shot of the back of the res, can see everything lining up nicely.
The "easy" part now begins - finishing up the rest of the tube. The angle connector from the CPU to GPU blocks also lined up nearly perfectly, super happy about that.
Tubing all completed!
Lookit the sexy beast! OK, still needs some slight panel adjustments to line up better, and some dusting. Happy all-in-all, though
Only waiting on a drain port plug to finish off this part of the build (where the masking tape currently is).This is just part one of the upgrade - I also have a pile of sleeving and a new PSU sitting here, but as I'd like to have the PC available most of the time, I'm going to get as many things sleeved as possible without having to offline my machine. I haven't yet decided what I'm going to do about sleeving the pump, though. That one was a bit of an oversight.


Comment